Import from Spline
This tutorial has been reported as out of date. The Spline export workflow may have changed since this was written. Proceed with caution.
Authors: Dhroov Makwana and Jonny Burger
Spline allows to design 3D models on the web. It allows exporting these models as React Three Fiber code, meaning that can be directly used and animated in Remotion.
This tutorial shows how to design, export and animate a scene with Spline and Remotion.
Create the 3D model in Spline
In this part I will go over all the steps for creating a 3D model in Spline, if you wish to, you can also skip this part and directly access the built model here.
-
Go to https://app.spline.design/, create a new account if necessary.
-
Click on the
New Filebutton on the top right to create a new project.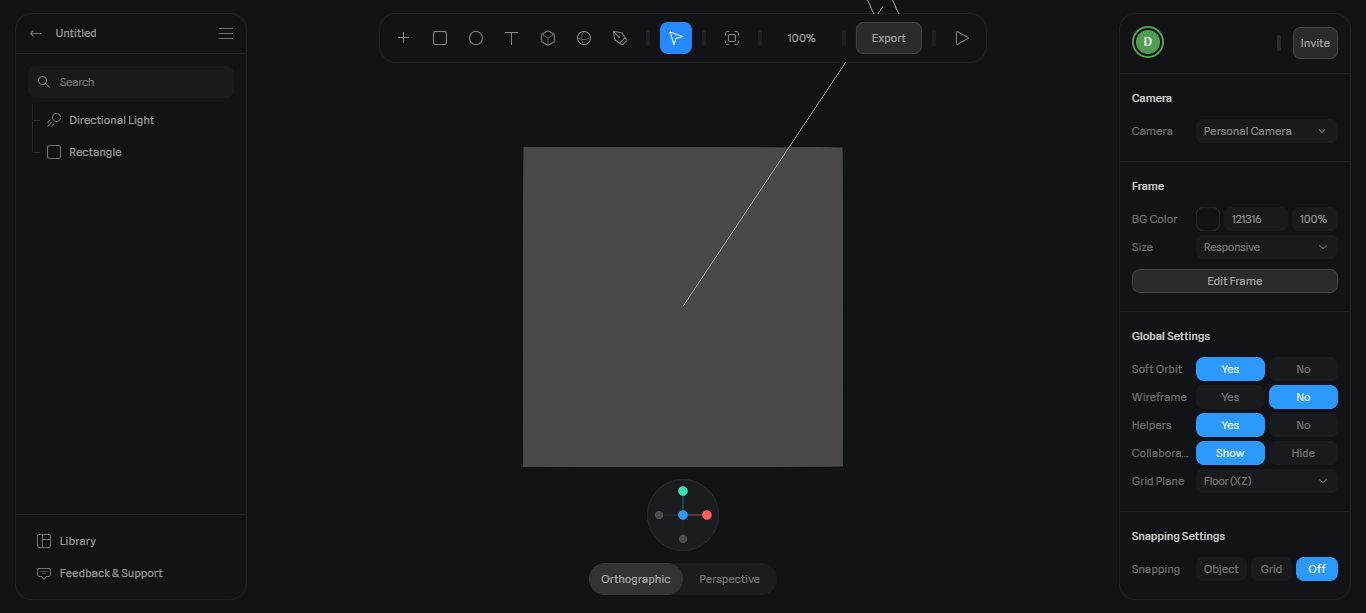
-
Click the box in the scene, and press Backspace, because we don't need it. We will also delete the directional light later, but keep it for now.
-
New shapes can be added using the + icon on the toolbar at the top. Click on it, scroll down and select Torus.


-
Once your cursor turns to a +, click anywhere on the screen to place the Torus.
The camera rotation can be changed by clicking and dragging while holding the Alt (Windows) or Option (Mac) key.
-
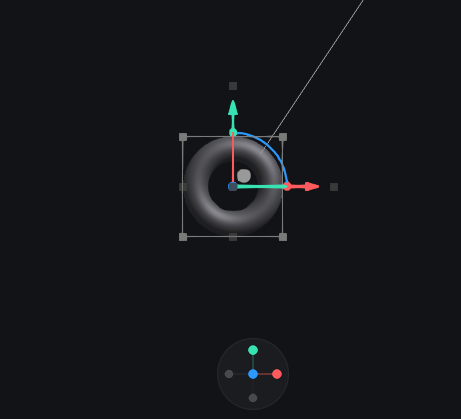
Center the Torus by right clicking on it, scrolling down and selecting
Reset Position. Alternatively, you can enter 0 in all three fields of the Position row on the right. -
Scale the Torus by a factor of two by entering
2in all three fields of the Scale row.
-
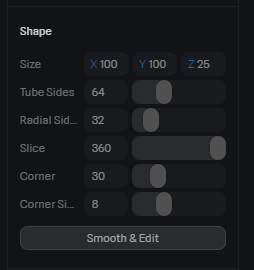
You can play around with the different fields in the Shape section to modify the Torus, however we will continue with the default properties.
-
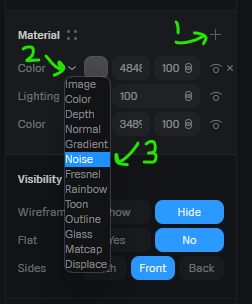
Scroll down to the Material section in the right column, click on the textbox beside the colour picker and enter
3489DCor any color you like. Effects on the 3D object in Spline are applied as layers, let's add another effect. -
Click on the + icon in the Material section, and from the dropdown select Noise
-
You'll notice that the colour you previously chose has been replaced by black and white noise, this is because the noise layer is covering all the layers below it. In order to fix this, click on the icon to the right of 100 in the noise row and select overlay.
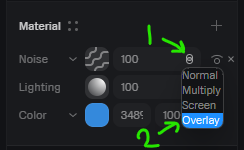
-
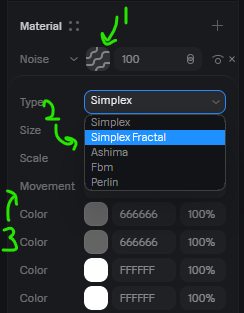
Finally, let's change the noise type, just for better visuals. Click on the squiggly lines beside noise, select Simplex Fractal and set Movement to 2.
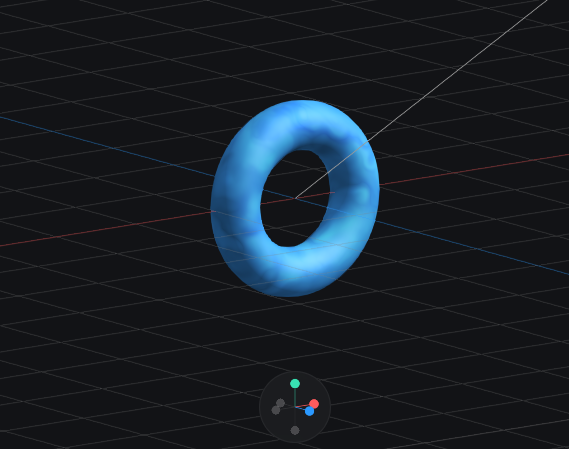
Your 3D model should look like this:
- Click on Directional Light in the left column, and press Backspace key because we don't need it anymore.
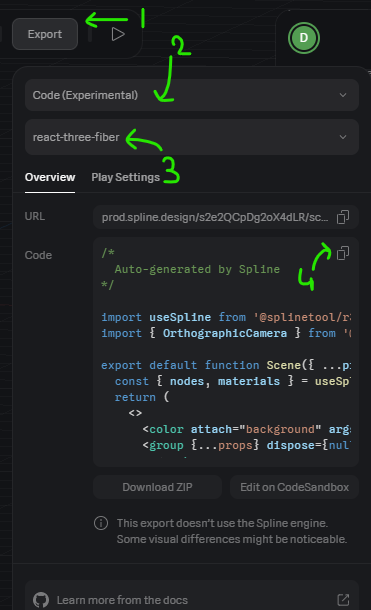
- Click Export in the top menu. Click on the first dropdown and select Code (Experimental). Select react-three-fiber in the second dropdown. Finally, click on the Copy icon in the code section to copy the generated code.
Animating 3D Model using Remotion
-
Create a new Remotion project from the React Three Fiber template by running
npx create-video@latest.
-
Install the
@splinetools/r3f-splinepackage:npm install @splinetool/r3f-spline -
Create a new file at
src/Torus.tsxwith the code that you have copied from Spline. -
Remove the
OrthographicCameraimport, and the<OrthographicCamera>component as we will be using theuseThreehook for the camera. -
In
src/Scene.tsx, replace the default scene with:
src/Root.tsximport {ThreeCanvas } from '@remotion/three'; import {useVideoConfig } from 'remotion'; importTorus from './Torus'; export constScene :React .FC = () => { const {width ,height } =useVideoConfig (); return ( <ThreeCanvas width ={width }height ={height }> <Torus /> </ThreeCanvas > ); };
- Add the following imports to
src/Torus.tsx:
src/Torus.tsximport React, {useEffect} from 'react'; import {useThree} from '@react-three/fiber'; import {interpolate, spring, useCurrentFrame, useVideoConfig} from 'remotion';
- Add the following code inside the Torus function below the
useSpline()call:
src/Torus.tsxconstframe =useCurrentFrame (); const {fps ,durationInFrames } =useVideoConfig ();
Position the camera to look at the center point from 200 z offset.
src/Torus.tsxconst camera = useThree((state) => state.camera); useEffect(() => { camera.position.set(0, 0, -400); camera.near = 0.2; camera.far = 1000; camera.lookAt(0, 0, 0); }, [camera]);
- Let's add some animation. Below the above code, insert the following:
src/Torus.tsxconstconstantRotation =interpolate (frame , [0,durationInFrames ], [0,Math .PI * 6], ); constentranceAnimation =spring ({frame ,fps ,config : {damping : 200, }, });
constantRotationwill cause the Torus to rotate forever. Math.PI * 2 equals a complete 360 degree rotation.entranceAnimationanimates from 0 to 1 over time using a spring animation.
- Find the
<mesh>element and replace it'sscaleandrotationparameters with:
scale={entranceAnimation + 3}
rotation={[constantRotation / 2, constantRotation, 0]}The X rotation is half of the Y rotation, so for every 2 turns in the Y axis, our Torus will turn once in the X axis.
-
That's it! See a rotating Torus in the Remotion Studio.
-
If you want to export your video to a MP4 video file, run:
npx remotion render